Rak Solar Node
Rak Solar Node with Parts from Rokland
In this post, I’ll cover what I could call my standard solar node build. I could have gone the fancy route, but the goal was a simple self-sustaining node that would go in a fixed location and likely high up. So as power-conscious as possible and easy to service if we ever had to. Rokland was my natural go-to with a kit that had all of the parts and could be easily done.
Rokland makes nothing off of this. I just believe in their product set enough to make mention of it here!
The nice thing here is that it can all be ordered in one shot from their site.
Parts List:
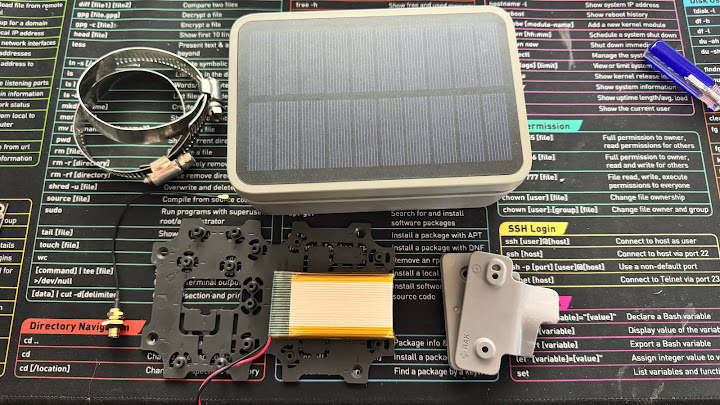
Rokland Rak Wireless Starter Kit
Rokland Rak Wireless Solar Kit
Rokland Pole Mount Kit for Solar Node
Rokland 3000 mah Battery with 2.0 JST Connector
I want to point out right away that the battery is a Makers Focus 3000 mah battery. Don’t get caught up with the same batteries on Amazon. Most of them you’ll find will have a 1.5 JST connector which WILL NOT WORK. The Rak 19007 board requires a 2.0 JST Connector. You’ll either need to cut off the 1.5 JST and replace it or just buy the battery from Rokland. No mess, no fuss. I’ve kept an eye out for these on Amazon and rarely find them without some sort of modification.
I found that Rokland does have excellent instructions. If you were to substitute any of the parts in this list they show you which ones you should cut out on the base board. For the sake of this post, I ended up with the starter kit which includes the 19007 base board and the 4631 module board. Rak offers plenty of module options that you could add on from collecting Temp and Humidity and reporting it back through the mesh. You could add those on if you would like, but I opted not too
Instructions are here:
Rokland Solar Enclosure Instructions
Without modules, there is a handy way of mounting the battery on the unused part of the solar plate. I’ve been using Gorilla double sided tape as it seems to adhere very well to these things.

With a pair of side cutters snip or another tool that will cut out the correct location cut out the sections to fit the board. This is covered in the instruction manual very clearly which ones to trim out. For the 19007 Rak base board, it will look something like this when you are done
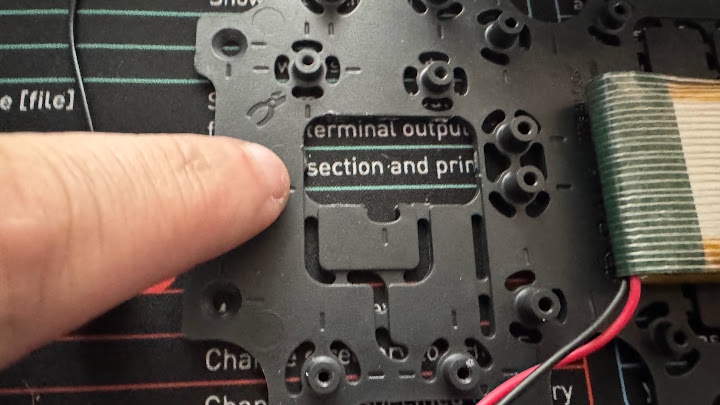
Using the supplied screws from the Rak starter kit put the baseboard on the solar plate. The USB port will face outwards from the edge of the plate. The nice thing is that it can only go one way based on the offset of the screw holes on the 19007.
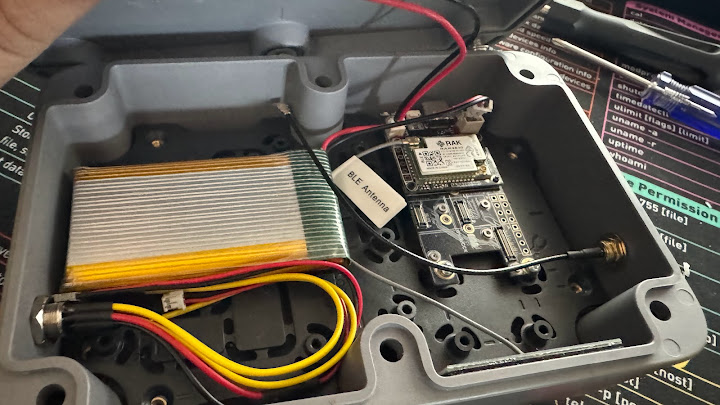
Slide the plate into the solar enclosure and then install the supplied USB cable thing and the antenna port. Both will go from the outside in and be held tight by the supplied nuts for each. I opted to not use or hook up the special USB cable but left it in there because it sealed the case.
I hooked up the supplied Bluetooth antenna. I think this could go many places based on what you think, but I opted to put in on the side of the case opposite of the Rak board. There was a nice slack there to tuck under the battery and hide away for now.
The solar panel plug from the lid goes in to the left port (or smaller port) and the battery connector goes into the right port (or larger port)
When completed it will look a little something like this:
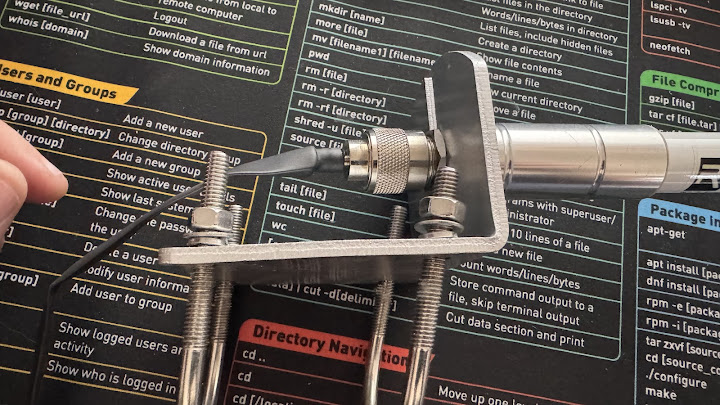
The only thing left is to put the mount brackets on the rear and mount it in a location that works!

As for the Antenna, this could be one of many things. I’ve standardized on the 8dbi Rokland Antenna. It has a good quality build and the kit comes with the mount to put up on a pole. I like this mount over the standard u bolts that other kits come with. I also can’t speak highly enough of the flat pigtails they make. They are meant to go into doors and windows, but I think they offer a nice level of protection over exposed cables, and at 18in are the right size to put the antenna right above the solar enclosure and keep everything nice and neat!
Hope this helps! As always find us on Discord or email and ask questions!